Risk Assessment - Health and Safety

Health and Safety form made from the studio.
Exercises
Produce a range of images to show correct use and understanding of electronic studio flash systems, exposure assessment and appropriate digital camera techniques. Exercises are to represent the preparatory work needed before attempting the related projects:
Exercise 1 – Lighting positions.
Exercise 2 – Lighting ratios.
Exercise 3 – Photographer research.
Photographic studio techniques – unit evidence
Portraiture
Before you attempt the projects associated with this assignment, you are required to complete the appropriate exercises, which are designed to show learning and understanding of the necessary techniques and skills related to working in a photographic studio.
Throughout the exercises and assignment you are to produce a range of images that show correct use and understanding of electronic studio flash systems and appropriate digital camera technique.
Evidence will be in the form of both colour and black & white images. All images are to be printed ‘Photo’ quality. Also to be on your blog.
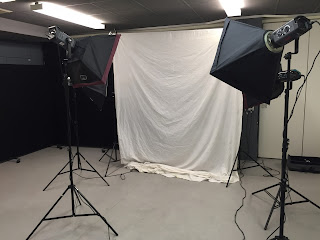
Studio Equipment
Some of the equipment used when working in the studio.

This is a good example of a canvas or paper backdrop, which can be rolled down when held by stands or tripods.

This shows different soft boxes that can be used on spotlights to create a softer light, as can be seen in this image.

Studio light that can be used for flash or continuous light, a soft box can be attached to this, its clipped to the front over the bulb.

light stands are used to hold the lights and they can be adjusted for height and moved around to wherever you want them.

Light reflector - this is used to reflect light onto the subject or any object you are shooting, it can be used to reflect from a spot into certain areas you want, because it's held as shown in the picture you can move around to get the light exactly where you want it.
Project one – ‘Rembrandt portrait’
Working in teams of four - one photographer, one model and one assistant One director – you are each to light and shoot a series of portrait photographs after the ‘Rembrandt’ style, achieved using a single light.
• You are to produce a minimum of two, high quality, A4 colour prints.
• You are then to produce a minimum of two, high quality, A4 Black &
white prints – using a different model from your ‘colour’ set.

Rembrandts Herman Doomer
You can see the the small triangular piece of light just below the right eye, the light was cast from the left and it does help to bring out his face from the shadows on the right side, in just the right tone and not to bright.
The time spent in the studio was are chance to try and take a portrait that would be similar to Rembrandts painting, in the same way he used the light and also the same position of the person in the picture. You can almost see a soft circular light shape, especially in the background.
Our own portraits taken.
Two pictures taken in the studio with a light soft box on a tripod, the light was kept quite low and the shadows have come out well. we have used a black background and i think this does make the head stand out well with how we've used the light source.
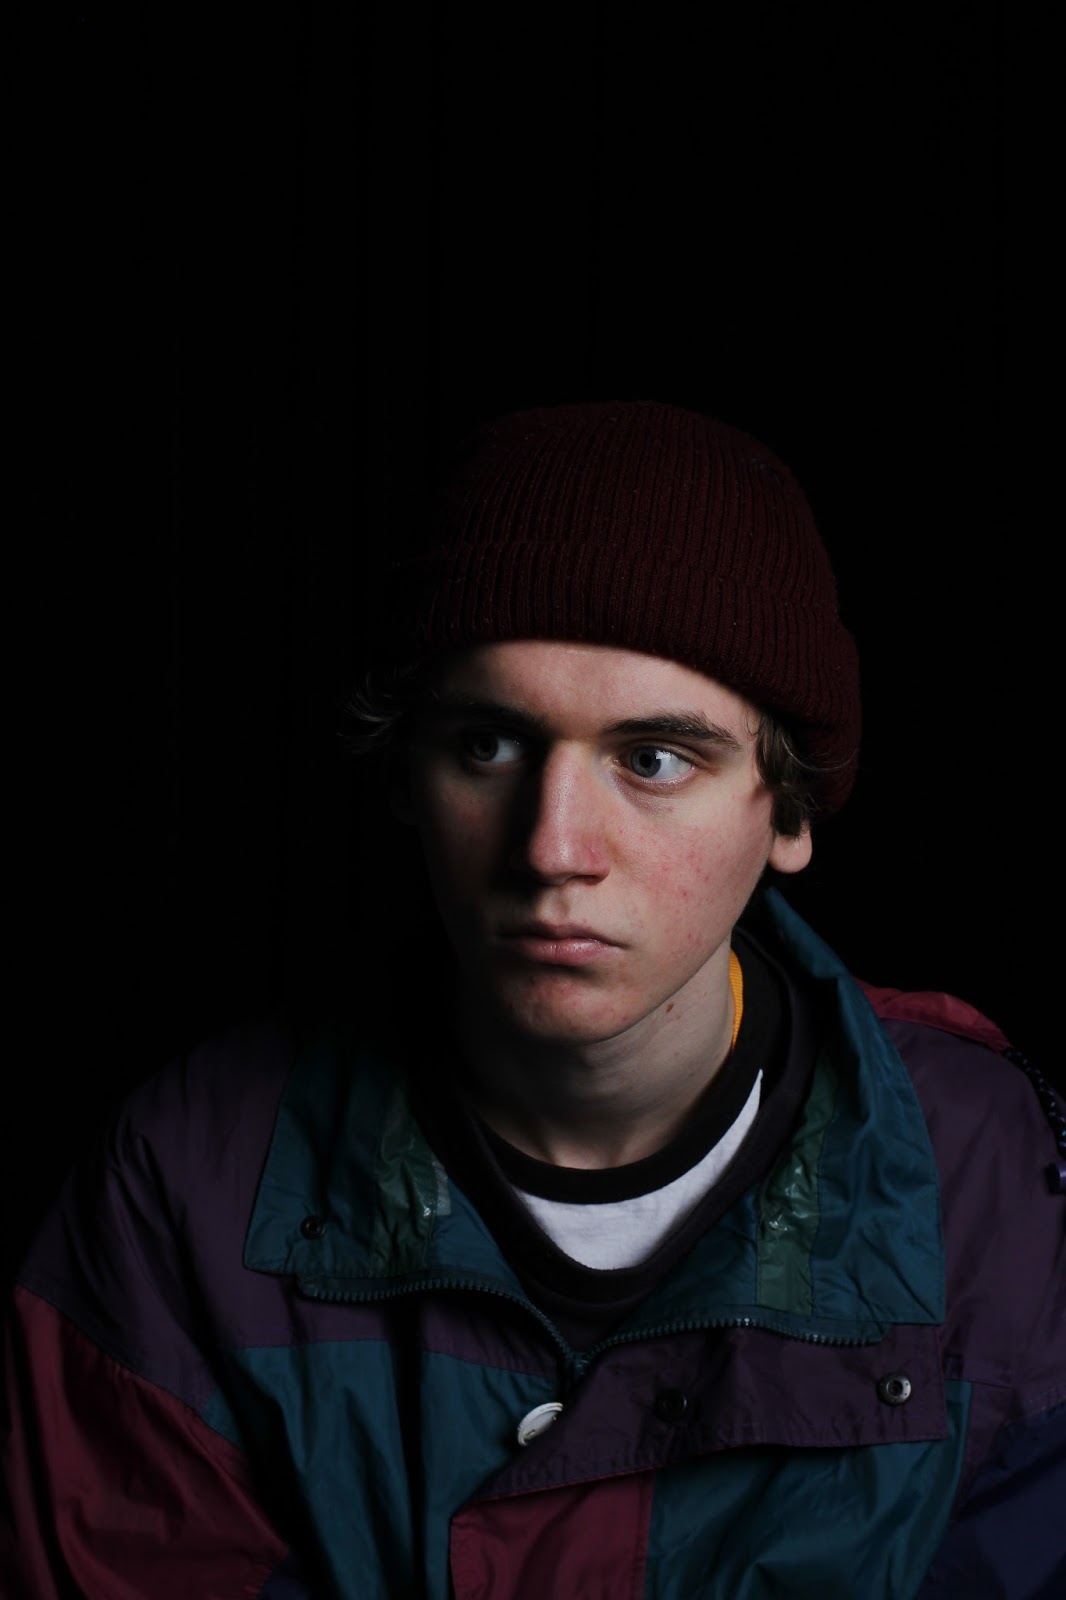

These are photos of how the light and camera was positioned although the first image does show the light on the opposite side that i used when i shot the portrait, we also had the light the light reflector for some pictures to get the light in certain areas that were to dark.


This is a diagram of how the light from the soft box and the reflector was positioned when i shot the pictures myself, the camera was in the middle on tripod and it was a black curtain in the background to give a plain dark black effect. I think it worked well and the photographs have achieved a similar cast of light across the head as Rembrandt's painting, Herman Doomer.
Lighting Positions


Exercise three – ‘Photographer Research’
You are to undertake personal illustrated research on any three of the following photographers, with reference to their studio portraits and incorporate on to your blog.
• Richard Avedon.
• Robert Mapplethorpe.
• Cecil Beaton.
• David Bailey.
• Annie Leibowitz
• Horst P Horst
In addition you are to research another studio based portrait photographers of your choice. Use this research as inspiration towards the ‘After the Style of’ project.
The three photographers i have chosen to look into are Richard Alvedon, Robbert Mapplethorpe and David Bailey. I have looked at some of their work as well which starts back as early as the 1940s up to the 1980s, i have picked some pictures that i like very much and i will talk a bit more about them.
Richard Avedon
Richard Alvedon was an American fashion and portrait photographer who was born in New York May 1923. His photographic career began when started taking pictures for advertising at a department store which then developed into fashion magazines, he later would produce pictures for Vogue and Life. His work would also cover a lot of commercial pictures working with well known fashion brands. His portraiture was something he liked very much because of how it would naturally express the person he was shooting

Robert Mitchum
This is a great portrait of Robert Mitchum, i think he has used a soft box just slightly left from the centre it has also been used from a higher level just above his head. I really like how the shadows have been cast and highlights are quite soft on certain areas of his face.

John Ford
This is an amazing portrait photograph of the very well known director John Ford, i think again he has used a light with a soft box but it is cast down from above his head, you can see the hi lights are showing on his forehead, nose, cheeks and also his lower lip. Although his head has not been included it is great composition and its good to see part of his neck and shoulders, it shows fantastic texture and helps with the depth.

Jack Niholson
A great picture of Jack Nicholson and Liz Taylor right in the middle, they look like they could well be at some sort of celebrity gathering, there seems to be a lot going on. Again it's great composition and the depth of field is shown so well with the mans face right in the foreground, then Nicholson on the right and the older man on the left and Liz right in the centre behind them with darker tone faces to the left. I think think it could have possibly been a flash used here just a bit left from the centre.
Robert Mapplethorpe.
Robert Mapplethope was born in New York in November 1946 he began taking his first photographs in the 1960s with just the type of camera that would have been used by anybody. Later in the 1970s he had then got himself a medium format camera and would begin taking photos of different groups of friends and socialites, he also lived with Patti Smith a good friend of his. Mapplethorpe would work mostly in the studio and much of his early work would be in black and white, some of his work would be considered as erotic and he would refer to some of his photographs as pornographic.

Robbert Mapplethorpe and Patti Smith
I like this picture of Mapplethorpe and Patti neither of them were looking at the camera when the photo was shot, by looking at the glass in the background you can tell the picture could have been taken with a flash, Patti's face stands out by catching the light against her dark hair it is a good combination with Robbert's shirt and it brings them both to the front, Roberts skin is a slightly darker tone to Patti's so it does make it the main focal point.

Pattie Smith
You can see with this other picture of Pattie how the light is cast from the lefthand side by the shadows on her left, but it's not to strong and it could well have been put through a soft box as it's not to much of glare. they grey tone of her skin and her black hair and slip on shoes stand out so well against the plain background.

This picture named Horse is quite a name but i like it how Patti is leant against the wall in quite a relaxed stance, the light is showing through the window on the righthand side i think this is shown by how its casting on to the right arm and down the that side of her body, also her face which shows well against the dark hair colour, it has a nice light triangular colour on his right which goes in well with the lighter part of his figure.
Cecil Beaton.
Sir Cecil Beaton was an English photographer born in Hampstead London 1904, he worked in the areas of fashion, portrait and would take pictures during WWII. In the late 1920s and early 1930s he he set up his own photography studio where people would come for him to take portrait pictures, he would also start to do work for the British Vogue and be involved with the world of fashion. During the war he was posted to the M.I which would record images from the home front and became known as one of Britain's best war photographers.

Men of the Long Range Desert Group after returning to headquarters at the end of a desert patrol, Siwa, Libya, 1942
I think this is a brilliant photograph that was taken during WWII and it has a totally natural feel, the three men have a well earned rest after a patrol and which this really does express. It would have been taken with normal daylight which has spread quite evenly and the soldier in the centre is just slightly in the shadow of the two chaps lighting their cigarettes i the foreground. All three of them stand out well against the light coloured shelter at the rear.

Cecil Beaton Photographs General: Royal Air Force
This is an amazing photo taken in a RAF bomber during WWII, Beaton would have been in the lower part of the plane looking up to the man in a gunning position on the aircraft. You can see the sunlight shining through the glass, it shows how young the lad is and also the tiredness and anxiousness in his face. It's really good how he has caught in the foreground equipment surrounding him but he is really well in focus in the centre wearing all his flight gear.

Cecil Beaton Photographs - Tyneside Shipyards,1943
This was taken of a lad working at Tyneside Shipyards back in 1943, it must have been shot whilst he was working and i think it would have been shot just using natural daylight, it works great with the depth of field and how the buildings in the background are slightly out of focus (blurred), the lad is brought right to the front because of this as he is really in focus. I think it works well with him not looking directly at the camera and in some ways it almost makes you think he's just caught him whilst he's walking to another part of the yard.
Project 2 – ‘After the style of’
Following your research into the work of other photographers during Exercise 3, select a ‘style’ that interests you and produce a minimum of two high quality portrait images, A4 colour or black & white that reflects that style.
My chosen Photographers style
I am planning to shoot a portrait 'After the style of' Richard Avedon, the work of his that I've looked at for my research especially the portrait shots of Robert Mitchum and John Ford, the pictures are in black and white and the light shows so much texture in the face, the studio lighting in the picture of Mitchum seems to be cast down from the top lefthand side, it creates such good soft shadow on the right side of his face.
Both of the portraits have such sharp focus and seem to quite close shots even to the point of the top of Fords head not being in the picture. I like these pictures a lot and the plain white backgrounds bing their faces right to the front, they
also look like they are not posing in any certain way and have normal facial expressions and they where not asked to pose in any particular way.
I think i will choose to use the short lighting technique

Short lighting illuminates the side of the face farthest from the camera and part of the near side as well. Because this creates shadows on the cheek facing the camera, it not only introduces tonal variety and contrast to the shot, but also appears to “shorten” or narrow the face, making the model look more slender. Short lighting encompasses many more specific styles, such as split, loop, and some Rembrandt setups and is particularly popular when lighting young women. However it does have the disadvantage of accentuating wrinkles and imperfections in the skin, especially when compared to its sister, broad lighting.
I think this should create the same lighting style of Avedons portraits but i will have to maybe change positions when I'm in the studio, or possibly try another technique, Butterfly light.


This was the lighting i finally used in the studio, it was four soft box lights two at the front slightly lower than the two behind all facing the white backdrop.

These are pictures of the lights when i had set them up in the studio.


These were the pictures that I shot in the studio with the light shown above.


The colour image has come out well, it shows the different shadows on the face.

I did decide tho change it to black and white as I was trying to make a picture in the style of Richard Avedon. The background has worked well on this shot and it did become plain white after i had made adjustments in Photoshop.


I think these pictures came out reasonably well although I think I could have maybe tried to make the background slightly clearer and especially with the second person, it's almost grey. I did adjust brightness and contrast levels in Photoshop and also changed from the original colour to black and white, which is what Richard Avedon used in his three pictures I've looked at
Still Life
Assignment three For this you will need to successfully complete the following project.
Projects
• Project 3 – Still life
Project four allows you to develop and extend your studio experience and requires a wider range of skills for successful completion. Remember you should demonstrate your technical skill and knowledge as well as considering the aesthetic visual/creative aspects of the subject.
Research the still life ‘flowers’ of Robert Mapplethorpe. Use these as inspiration to
produce your own ‘flower’ still life.
Your work should relate to your research.
An important aspect of this assignment is the use of your Blog to show your thinking and to record initial ideas and their development through to the final outcome. Remember to annotate your Blog throughout.
Robert Mapplethorpe's Flowers
Mapplethorpe's flowers are all very simple detailed sharp focused shots, the pictures seem to be quite close to the flower itself especially with the pictures I've looked at.

It really is quite amazing the detail of the colour on the petals and the smallest areas make such an interesting picture, in this picture it looks like it could be a painting.

In This picture the flower itself has a great shape and the lighter tone of green int the middle does help to bring your eye into the centre, the backdrop starts with a grey colour at the bottom and starts to go into a darker tone as it rises until it's black at the top, this really does bring the white to the front.


This is such a good shot and it really does show the texture and form of the flower so well, you really can see the different shapes and depth of the petals, I think it would be a soft light shone down from the top left, it has a plain black backdrop similar to the green and white flower before.

The flower in this picture is slightly more simple than those in the other pictures although the subtle white tones make it softer, because of the dark backdrop again it does make you really look in to the flower and it's shape.
I will try to use the same technique as Mapplethorpe and have quite a dark background so it really does draw your eye into the flower itself and allows you to see the detail and texture, I don't think i'll use any bright lighting and it will be quite soft light similar to what he's used, I think its good to use be using shadows to show the texture.
My Own still life of flowers
These are my still life I shot, they were taken with soft light and also a small spot light shone from below and in front.

The drops of water have created such a nice effect on this shot and pick up the light so well, even though the flower is surrounded by back this really does help you to focus on the detail of the flower.

I am happy with how this picture came out, it is quite up close but it does show such good texture with how the light is cast, the back drop is not to dark as it is in the first picture.


These two pictures have quite good composition and the flowers in the pot are right in the middle, the shadows of the plant itself cast on the backdrop have worked nicely and you can see the circle of how the light is cast.
The material backdrop also has some kind of texture to it as well and its not to plain, the slightly darker tone helps to bring the flower tom the front.
Evaluation
This unit has been a brilliant way to introduce us to working in the studio and using different techniques which allow you to create so many different styles of pictures. It is a lot different when working in the studio as you are able to really control light, composition and how you want the final photograph to look. It really does make you understand how and why it would be used in the commercial area, especially clothes modelling as well as many other areas.
No comments:
Post a Comment